Masters runners with a good number of miles or running years on the clock can often struggle with muscle issues because of a buildup of scar tissue. Microscopic strains occur within muscle tissue as a result of running and the ensuing scarring builds up over time. This scar tissue then becomes more fibrous, less elastic and more brittle and, therefore, is more likely to tear rather than stretch to absorb the load that is placed on it. The muscles can have ‘knots’ of scar tissue, which feel like thicker lumps. Put this alongside a muscle that is not as strong as it once was (owing to age) and you have the perfect recipe for strains. This is the same for any muscle group, but it’s particularly true in areas where you have previously had issues.
The calf muscles are the most likely to suffer from this problem. The lumps are typically felt on the inside of the muscle if you pronate and on the outside if you tend to land on the outside of your foot. I liken it to feeling a bag of marbles.
The sharp pain of a strain or sprain of scar tissue seems to come out of nowhere, even when you have warmed up well. It can also manifest as a gradually increasing ache in the muscle, followed by cramp. Either way, it can be frustrating, but time spent improving this tissue’s elasticity and strength can help.
The best combination is to work the tissue hard one day, then easy the next, to allow recovery and adaptation. The aim is to open up the fibres, breaking up the tight cross-links and stretching the collagen fibres. Most scar tissue is made up of type 1 collagen, which, gram for gram, is stronger than steel; this means you need to work it hard to change it.
Mobilisation moves
You need to mobilise the fibrous tissues to improve elasticity and strength. This is a combination of manual work on the area and targeted strength work.
Calf mobilisation
Sit on the floor with one knee bent. Find the thick spots in your calf and work your thumbs into the tissues. Alternatively, use a can, a metal water bottle or a dumbbell handle to roll over the troublesome spot. (A foam roller is too wide to work well.) When you find the tight spot, maintain the pressure while you move the foot up and down. Repeat on the other leg.
Hamstring mobilisation
Sit on a chair and place a towel, then a hard ball (such as a cricket or hockey ball) under one of your hamstrings. Lean forward at the hip, then slowly straighten your leg until you feel the ball hitting the tight spot. Wriggle around until you feel it relax, then straighten the leg a little more and continue. Repeat on the other leg.
Strength moves
Start slowly with light resistance and build gradually. You must respect the time it takes for muscle tissue to adapt, which is a minimum of four weeks and, realistically, eight or 10, before you see meaningful change. Start with sets of eight to 10 reps for three to five sets, three times a week and not on hard mobilisation days. Build up as you feel able.
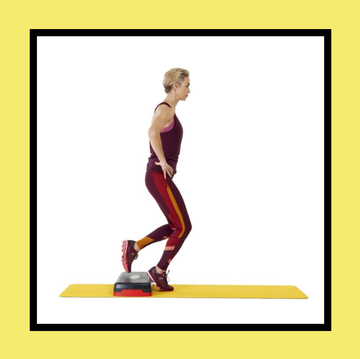
Single-leg calf raise
Stand on the edge of a step, with your feet hip-width apart and knees bent slightly. Shift your weight onto one leg and let the other one hang. Let the standing heel drop, then push through your forefoot to come up to your tiptoes and straighten your leg. Pause, then lower your heel back down while bending your leg. Repeat on the other leg.
Single-leg hop
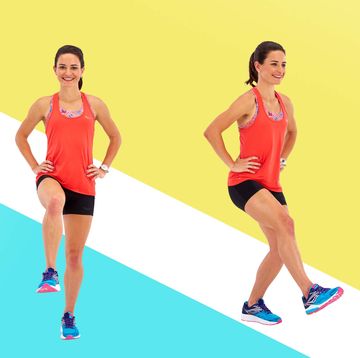
Rise onto the tiptoes of the leg to be worked. Hop on the spot and try to stay high on the ball of your foot – keep your knee over your foot throughout. The hops should be controlled, continuous and done at a running tempo. Repeat on the other leg.
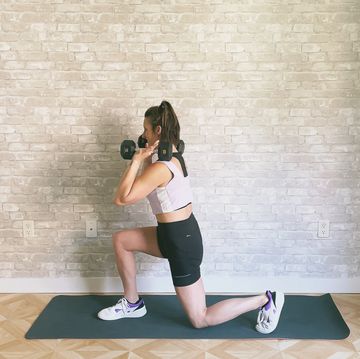
Split squat
Take a long step forward as if performing a lunge. The heel of your back foot should be raised. With your torso straight, lower slowly until your back knee almost touches the floor, then push back up. Keep your knees in line with your toes and don’t let the front knee stray past your foot as you lower. Complete all your reps on one leg, then switch to the other.
Backward-to-forward hop
Take a big step forward with your left foot. Repeatedly bounce from your back foot to your front foot and back again. Keep it rhythmical. Absorb the impact and drive of each leg in a controlled manner. Ensure you maintain alignment of your front knee over the foot on the landing and keep your feet pointing forward. Change your lead leg when you complete your reps.
Mark Buckingham is a consultant physiotherapist to British Athletics and runs the Witty, Pask and Buckingham practice in Northampton. wpbphysio.co.uk
Like this article? Sign up to our newsletter to get more articles like this delivered straight to your inbox.
While you're at it, subscribe to the magazine here and get it through your letterbox each month


